
mitsubishi air conditioner troubleshooting guide
Navigating issues with your Mitsubishi AC? This guide offers solutions for common problems, error codes, and maintenance, ensuring optimal performance and longevity of your system.
Understanding Your Mitsubishi AC System
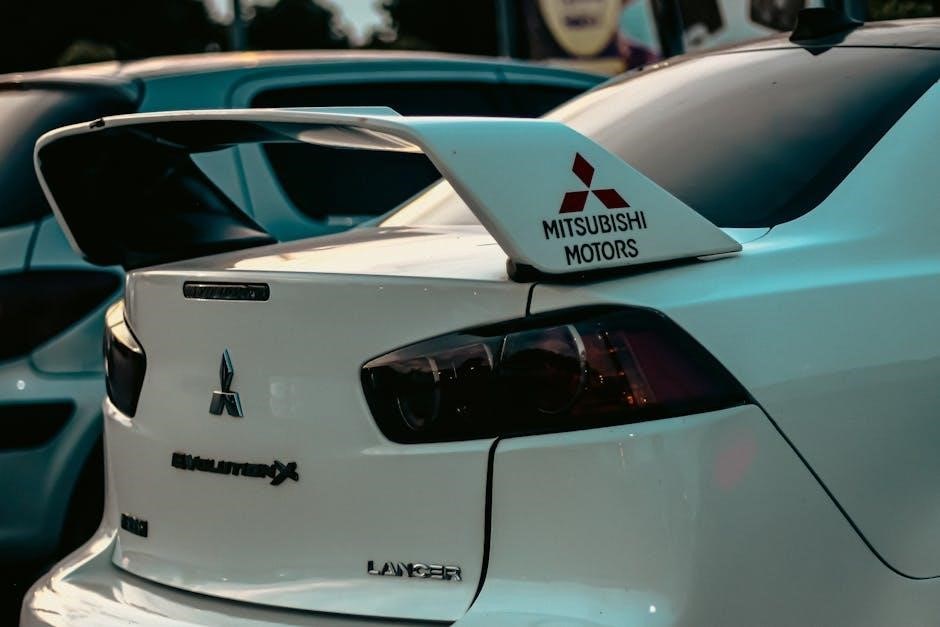
Mitsubishi’s mini-split systems, including the Hyper Heat series, are renowned for efficiency and performance, particularly in diverse climates. These systems utilize refrigerant (often R410A) to transfer heat, offering both cooling and heating capabilities. Key components include the indoor unit (evaporator), outdoor unit (condenser), compressor, and a network of wiring and controls.
Understanding the condensate pump’s role in drainage is crucial, as is recognizing potential issues with floor and door wiring harnesses. Regular maintenance, like filter cleaning, is vital for sustained operation. Knowing your specific model and its error code system is the first step towards effective troubleshooting.
Common Mitsubishi AC Problems
Mitsubishi AC units can experience a range of issues, from cooling inadequacies and warm air blowing to electrical faults like units failing to power on or tripping circuit breakers. Drainage problems, including leaks from the indoor unit and clogged drain lines, are frequent concerns. Fan malfunctions, affecting both indoor and outdoor units, also occur.
Recent reports highlight wiring harness issues, specifically with floor and door wiring, potentially causing intermittent problems. Remote control malfunctions and refrigerant-related concerns, such as low levels or leaks, are also common.
Error Codes and Their Meanings
Mitsubishi AC systems utilize error codes to signal malfunctions, aiding in diagnosis. Decoding these codes is crucial for effective troubleshooting. Common examples include E1 and E2, each representing a specific issue within the system. Understanding these signals allows for targeted repairs, preventing further damage.
The error code display provides vital clues; referencing a comprehensive code list is essential. For Hyper Heat systems, unique error codes may appear, requiring specialized knowledge. Ignoring these codes can lead to escalating problems and costly repairs.
Decoding the Error Code Display
The error code display on your Mitsubishi AC unit is a critical diagnostic tool. Typically, the display will flash a code, often a letter followed by a number (e.g., E1, E5). Note the code precisely, as even slight variations can indicate different problems. Refer to your unit’s manual or online resources for a complete code list.
Pay attention to any accompanying indicators, like flashing lights, which can provide additional context. Documenting the code and circumstances surrounding its appearance aids technicians in accurate diagnosis.
Specific Error Code Examples (E1, E2, E5, etc.)
Error code E1 often signals an issue with the indoor unit’s temperature sensor. E2 frequently indicates a problem with the communication between the indoor and outdoor units. E5 commonly points to a malfunction in the outdoor unit’s fan motor or related components.
These are just examples; numerous other codes exist. Always consult your specific model’s documentation for accurate interpretations. Ignoring error codes can lead to further damage and costly repairs, so prompt attention is crucial.
Troubleshooting Steps: Cooling Issues
Addressing insufficient cooling begins with verifying air filter cleanliness. A clogged filter restricts airflow, diminishing cooling capacity. Next, check outdoor unit coils for debris, ensuring proper heat exchange. Confirm thermostat settings are correct – set to “cool” and a reasonable temperature.
If issues persist, inspect for ice buildup on coils, indicating potential refrigerant or airflow problems. Listen for unusual noises, potentially signaling compressor or fan motor malfunctions.
AC Not Cooling Enough
Insufficient cooling often stems from restricted airflow. Begin by inspecting and replacing the air filter – a dirty filter drastically reduces efficiency. Ensure vents aren’t blocked by furniture or curtains. Check the outdoor unit for obstructions like leaves or debris around the coils, hindering heat dissipation.
Verify thermostat settings and consider a professional inspection if the problem continues, potentially indicating refrigerant issues or compressor problems.
AC Blowing Warm Air
Warm air suggests a significant issue, potentially refrigerant-related. Low refrigerant levels, caused by leaks, are a common culprit. Inspect the outdoor unit for frozen coils – this restricts refrigerant flow. A malfunctioning compressor, the heart of the cooling system, can also cause warm air circulation.
Check for tripped breakers or blown fuses. If issues persist, a qualified technician is crucial for diagnosis and repair, especially concerning refrigerant handling.
Troubleshooting Steps: Electrical Problems
Electrical faults can completely halt AC operation. Begin by verifying the power supply – check the circuit breaker hasn’t tripped and fuses are intact. Inspect wiring for any visible damage, loose connections, or signs of burning. A faulty capacitor, crucial for motor starting, is a frequent cause of failure.
Safety first: disconnect power before any inspection. If uncomfortable, immediately contact a qualified HVAC technician for diagnosis and repair.
Unit Won’t Turn On
If your Mitsubishi AC refuses to power on, start with the simplest checks. Ensure the unit is properly plugged in and the power switch is engaged. Verify the circuit breaker hasn’t tripped – a common issue, especially with initial startup or power surges. Check the remote control batteries and settings.
If these fail, a deeper electrical issue may exist. Disconnect power and consult a qualified technician for safe diagnosis and repair, avoiding potential hazards.
Tripped Circuit Breaker
A frequently tripped circuit breaker signals an electrical overload. Before resetting, disconnect other appliances on the same circuit to reduce the load. If the breaker trips immediately upon reset, avoid repeated attempts – this indicates a serious problem.
Potential causes include a faulty compressor, a wiring issue within the unit, or a significant power surge. Do not attempt self-repair; contact a qualified HVAC technician for a safe and accurate diagnosis and resolution.
Troubleshooting Steps: Drainage Issues

Proper drainage is crucial for AC function. Issues manifest as water leaks or a full condensate pump. First, inspect the indoor unit for visible leaks, checking around the evaporator coil and drain pan. A clogged drain line is a common culprit, restricting water flow.
To clear a blockage, try using a wet/dry vacuum to suction debris from the drain line opening. If problems persist, professional cleaning or pump replacement may be necessary to prevent water damage.
Water Leaking from Indoor Unit
A leak signals a drainage problem. Immediately power off the unit to prevent electrical hazards and water damage. Inspect the indoor unit’s drain pan for cracks or overflows. Check the condensate drain line for clogs – a common cause. Listen for the sound of water within the unit, indicating a blockage.
Carefully assess the area around the unit for water accumulation. If the leak persists after checking these areas, professional inspection is recommended to diagnose and repair the underlying issue;
Clogged Drain Line
A clogged drain line is a frequent cause of leaks. Locate the drain line, typically a PVC pipe exiting the outdoor unit or near the indoor unit. Carefully disconnect the line and check for obstructions like algae, mold, or debris. You can attempt to flush it with a wet/dry vacuum or gently with distilled vinegar.
Preventative maintenance includes regular flushing of the drain line to avoid buildup. If you’re uncomfortable performing this task, consult a qualified HVAC technician for assistance and proper cleaning.
Troubleshooting Steps: Fan Problems
Fan malfunctions significantly impact cooling performance. Begin by checking for obstructions blocking airflow to both the indoor and outdoor fans. Ensure the fan blades are clean and free from debris. If the fan doesn’t start, verify the power supply and check the fan motor capacitor – a common failure point.
A humming sound might indicate a failing motor, while complete silence suggests a power issue. Always disconnect power before inspecting fan components and consult a professional if unsure.
Indoor Fan Not Working
A non-functioning indoor fan prevents proper air circulation, leading to inconsistent temperatures. First, confirm the unit receives power and the thermostat is set correctly. Inspect the fan motor for visible damage or obstructions. A faulty capacitor is a frequent cause; testing requires a multimeter and caution.
Listen for humming, indicating a potential motor issue. If the fan remains still, professional diagnosis is recommended to avoid electrical hazards and ensure correct repair.

Outdoor Fan Not Working
If the outdoor fan isn’t running, the system can overheat and shut down. Begin by verifying power to the outdoor unit and checking for tripped breakers. Inspect the fan blades for obstructions like leaves or debris, ensuring free rotation. A failing capacitor is a common culprit, requiring professional testing.
Listen for unusual noises, which might indicate a motor problem. Do not attempt repairs yourself; contact a qualified technician for safe and effective resolution.
Troubleshooting Steps: Remote Control Issues
A non-responsive remote is a frequent issue. First, replace the batteries with fresh ones, ensuring correct polarity. Check the remote’s sensor for obstructions and aim it directly at the indoor unit’s receiver. Verify the remote isn’t set to a different operating mode (like “Fan Only”).
If problems persist, try resetting the remote by removing and reinserting the batteries. Incorrect settings can also cause issues; double-check temperature and fan speed selections.
Remote Not Responding
If your Mitsubishi AC remote isn’t working, begin with the simplest solutions. Replace the batteries – even seemingly new ones can be weak. Ensure there’s a clear line of sight between the remote and the indoor unit’s sensor, removing any obstructions. Confirm the remote isn’t accidentally set to a different function, like just the fan.
Try resetting the remote by briefly removing and reinserting the batteries. A faulty remote may require replacement, but test these steps first!
Incorrect Remote Settings
A seemingly unresponsive AC might simply have incorrect remote settings. Double-check the mode selection – is it set to “Auto,” “Cool,” “Dry,” or “Heat” as desired? Verify the temperature setting isn’t set too high (cooling) or too low (heating). Ensure the fan speed is appropriate for your comfort level.
Also, confirm the timer function isn’t activated, preventing the unit from operating when you expect. Explore all remote buttons to ensure no unintended settings are engaged.
Maintenance Tips to Prevent Problems
Proactive maintenance extends your Mitsubishi AC’s lifespan and efficiency. Regular filter cleaning is paramount – dirty filters restrict airflow, reducing cooling and increasing energy consumption. Aim to clean or replace filters monthly during peak usage. Coil cleaning is also crucial; dirty coils hinder heat transfer.
Periodically inspect and clear the condensate drain line to prevent clogs and water leaks. Schedule annual professional servicing for a comprehensive system check and optimal performance.
Regular Filter Cleaning
Maintaining clean filters is the simplest, yet most impactful, AC maintenance task. Dirty filters restrict airflow, forcing your Mitsubishi system to work harder, reducing cooling efficiency and increasing energy bills. Inspect filters monthly, especially during heavy use.
Washable filters can be vacuumed or rinsed; disposable filters should be replaced. A clean filter ensures optimal performance, prolongs system life, and improves indoor air quality. Neglecting this step leads to costly repairs.
Coil Cleaning
Dirty evaporator and condenser coils significantly reduce AC efficiency. Over time, dust and debris accumulate, hindering heat transfer. Inspect coils annually and clean them gently with a coil cleaner specifically designed for AC units – avoid harsh chemicals or abrasive tools.
Turn off power before cleaning. A clean coil allows for optimal heat exchange, lowering energy consumption and extending the lifespan of your Mitsubishi air conditioning system. Professional cleaning is recommended for heavily soiled coils.
Condensate Pump Troubleshooting
The condensate pump removes water generated during the cooling process. Issues include pump failure or overflow, often signaled by water leaks. Check for clogs in the pump reservoir and drain line – debris can obstruct flow. Listen for unusual noises; a failing pump may hum or click.
Regularly inspect and clean the pump to prevent problems. If the pump isn’t working, test its power supply. A consistently overflowing pump indicates a blockage or pump malfunction requiring professional attention.
Pump Not Working
If your condensate pump isn’t operating, begin by verifying its power source – check the wiring and circuit. A lack of power is a common cause. Next, inspect the pump’s float switch; ensure it moves freely and isn’t stuck in the ‘off’ position. Carefully examine the pump for physical damage or obstructions.
Testing with a multimeter can confirm power delivery. If power is present but the pump remains inactive, replacement is likely necessary. Ignoring this issue can lead to water damage.
Pump Overflowing
An overflowing condensate pump signals a blockage or pump failure. First, disconnect power to the AC unit. Inspect the pump’s reservoir and drain line for clogs – debris, algae, or mold can accumulate. Clear any obstructions carefully. Verify the float switch isn’t stuck, preventing the pump from activating.
If the pump continues to overflow after cleaning, the pump itself may be faulty and require replacement. Prompt attention prevents water damage and mold growth within your home.
Refrigerant Issues
Refrigerant problems significantly impact cooling performance. Low refrigerant levels, often due to leaks, cause insufficient cooling or the unit to blow warm air. Never attempt to recharge refrigerant yourself – it requires specialized equipment and certification.
Refrigerant leaks must be located and sealed by a qualified HVAC technician. Ignoring leaks harms the environment and can lead to compressor failure, resulting in costly repairs or replacement.
Low Refrigerant Levels
Insufficient refrigerant hinders the AC’s ability to absorb heat, leading to weak cooling or warm air output. This isn’t typically a DIY fix; a professional must identify the cause. Low levels almost always indicate a leak somewhere within the system’s lines or components.
Symptoms include ice buildup on the evaporator coil and prolonged run times. Attempting to operate with low refrigerant can damage the compressor, creating a far more expensive repair.
Refrigerant Leaks
Refrigerant leaks are a primary cause of low refrigerant levels, demanding professional attention. Even small leaks steadily diminish cooling capacity over time. Common leak locations include flared connections, valve stems, and the evaporator or condenser coils themselves.
Detecting leaks requires specialized equipment, like electronic leak detectors. Repairing leaks often involves brazing or replacing damaged components, followed by a vacuum and recharge with the correct refrigerant type (typically R410A).
Wiring Harness Issues (Based on Recent Reports)
Recent reports highlight potential wiring harness problems in Mitsubishi AC units, specifically concerning the floor and door wiring. Issues manifest as intermittent operation or components failing to respond – like heated seats staying off or flashing. The left-hand (LH) floor wiring harness appears frequently mentioned in these reports.
Door switch malfunctions can also trigger errors. Thorough inspection of wiring for damage, corrosion, or loose connections is crucial. Professional diagnosis is recommended due to the complexity of these systems.
Floor Wiring Harness Problems
Reports indicate the left-hand (LH) floor wiring harness is a common point of failure in Mitsubishi AC systems. This harness often combines with other wiring, like the fuel or rear door harnesses, increasing complexity. Symptoms include intermittent operation of features connected to this harness, such as heated seats failing to activate or displaying a constant flashing indicator.
Inspect the harness carefully for damage, corrosion, or loose connections. A visual check may reveal obvious issues, but a multimeter is needed for a comprehensive assessment. Professional assistance is often required for repair or replacement.
Door Switch Issues
Faulty door switches, particularly the left-hand (LH) front door switch, can trigger unexpected behavior in your Mitsubishi AC system. These switches often interact with safety features and operational controls. A malfunctioning switch may cause the indoor unit to enter an emergency stop mode, halting operation and displaying error codes.
Testing the switch with a multimeter is crucial to determine if it’s functioning correctly. Replacement is typically straightforward, but ensure the correct switch is used for your specific model. Ignoring this issue can lead to continued disruptions.

Hyper Heat System Specific Issues
Mitsubishi’s Hyper Heat systems excel in cold climates, but unique challenges can arise. Performance may diminish in extreme temperatures if the unit is undersized or improperly installed. Pay attention to unique error codes not found in standard models, as these pinpoint Hyper Heat-specific problems.
Ensure proper defrost cycles are occurring; ice buildup reduces efficiency. Regularly check outdoor unit clearances for snow and ice accumulation. Consider professional inspection to optimize performance during severe weather conditions.
Performance in Extreme Temperatures
Hyper Heat systems are designed for frigid conditions, but performance can still be affected. Extremely low temperatures may reduce heating capacity if the unit isn’t appropriately sized for the space. Ice accumulation on the outdoor coil hinders heat transfer, requiring a defrost cycle.
Monitor for reduced airflow or longer run times. Ensure proper insulation around ductwork to minimize heat loss. Professional assessment can determine if the system is functioning optimally in severe cold, and if adjustments are needed.
Unique Error Codes for Hyper Heat
Hyper Heat systems utilize specific error codes beyond standard Mitsubishi AC units. These codes often relate to defrost cycles, outdoor unit sensors, or the unique heating functionalities. Error codes indicate issues with the system’s ability to maintain temperature in extreme cold.
Consult the Hyper Heat-specific error code list in the owner’s manual or online resources. Document the error code and any accompanying symptoms before contacting a technician for accurate diagnosis and repair.
When to Call a Professional
Attempting complex repairs yourself can be dangerous and void your warranty. If you encounter refrigerant leaks, electrical issues, or consistently recurring error codes, immediately contact a qualified HVAC technician. Prioritize safety – never work with electrical components without disconnecting power.
A professional possesses specialized tools and knowledge for accurate diagnosis and repair. Finding a certified Mitsubishi technician ensures proper handling of your system and adherence to safety standards.
Safety Precautions
Always disconnect power to the unit at the circuit breaker before any inspection or maintenance. Never attempt repairs involving refrigerant lines – this requires specialized training and equipment. Be cautious of sharp edges within the unit, and wear appropriate protective gear like gloves.
Avoid working with electrical components if you are uncomfortable or lack experience. If you suspect a refrigerant leak, ventilate the area immediately and contact a professional. Prioritize your safety above all else.
Finding a Qualified Technician
Seek a technician certified to work on Mitsubishi HVAC systems, ensuring expertise with your specific unit. Check online reviews and ask for recommendations from friends or family. Verify licensing and insurance to protect yourself from liability;
Obtain multiple quotes detailing the scope of work and associated costs. Discuss the technician’s experience with similar issues and their proposed solutions. A reputable technician will prioritize safety and provide transparent communication.