

mini led projector user manual
Mini LED projectors are portable, compact devices offering an impressive entertainment solution with long LED lamp life, versatile connectivity options, and sleek designs.
1.1 Overview of Mini LED Projectors
Mini LED projectors are compact, portable devices designed for versatile use, offering high-quality projections with long-lasting LED lamps. They feature sleek designs, advanced optical engines, and user-friendly interfaces. These projectors support multiple connectivity options, including HDMI, USB, and wireless connections, making them ideal for home entertainment, presentations, and outdoor activities. With LED lamp lifespans up to 50,000 hours, they provide reliable performance. Their lightweight and compact size allow easy transportation, while manual focus adjustment ensures clear images. These projectors are perfect for family gatherings, camping trips, or small business meetings, delivering vibrant colors and sharp visuals in various settings.
1.2 Importance of Reading the Manual
Reading the user manual is crucial for safely and effectively operating a mini LED projector. It provides essential information on setup, connectivity, and maintenance, ensuring optimal performance. The manual outlines safety precautions, such as proper ventilation and electrical guidelines, to prevent damage or hazards. It also explains how to utilize advanced features like keystone correction and color adjustment. By following the manual, users can extend the LED lamp life and troubleshoot common issues, enhancing their overall experience. Familiarizing yourself with the guide ensures you make the most of your projector’s capabilities while maintaining its longevity and functionality.
Product Features
Mini LED projectors offer a portable design, long-lasting LED lamps, multiple interfaces like HDMI and USB, and excellent projection capabilities for high-quality image display and entertainment.
2.1 Design and Build Quality
Mini LED projectors feature a sleek and compact design, making them highly portable. Their sturdy build ensures durability, while the lightweight construction allows for easy transport. Many models include a white finish with an arc design, enhancing both aesthetics and functionality; Proper ventilation systems are integrated to prevent overheating, ensuring steady performance during extended use. The overall design prioritizes user convenience, with easy-to-access controls and a focus on reliability for both indoor and outdoor entertainment. This blend of style and practicality makes them ideal for various settings.
2.2 LED Lamp Life Expectancy
The LED lamp in mini projectors is designed for longevity, typically lasting up to 50,000 hours. This extended lifespan ensures consistent performance over years of use. The LED technology is energy-efficient and produces vibrant colors while maintaining brightness. Proper maintenance, such as avoiding overheating and adjusting brightness settings, can further extend the lamp’s life. This durability makes mini LED projectors a reliable choice for both casual and frequent use, providing a cost-effective solution for home entertainment and presentations.
2.3 Available Interfaces (HDMI, USB, etc.)
Mini LED projectors come equipped with a variety of interfaces to ensure versatile connectivity. Common ports include HDMI for high-definition video and audio, USB for connecting external storage devices, and AV inputs for legacy devices. Some models also feature SD card slots and VGA ports, catering to different connection needs. Wireless connectivity options like Wi-Fi Display, Miracast, and DLNA are often included, enabling seamless streaming from mobile devices. These interfaces make it easy to connect to laptops, gaming consoles, smartphones, and more, ensuring compatibility with a wide range of devices for enhanced functionality and convenience.
2.4 Projection Capabilities and Image Quality
Mini LED projectors deliver impressive projection capabilities with high brightness and vivid color accuracy, ensuring a cinematic experience. They support various image sizes, typically ranging from 27 to 150 inches, depending on the model. The LED technology provides consistent image quality over time, with a focus on sharpness and clarity. Many models feature manual focus adjustment and keystone correction, allowing users to fine-tune the image alignment. With native resolutions up to 720p or higher, these projectors are ideal for movies, presentations, and gaming, offering a balance of performance and portability for both indoor and outdoor use.
Safety Precautions
Ensure safety and longevity by following precautions. Avoid exposure to liquids, prevent ventilation blockage, use grounded power cables, and maintain clearance around the projector for optimal performance.
3.1 General Safety Warnings
Always read the manual before using the projector. Avoid exposing it to liquids or moisture, as this can cause damage or electrical hazards. Ensure proper ventilation to prevent overheating, and keep the projector away from flammable materials. Never cover the ventilation holes or place objects inside them. Use only the provided power cord and avoid overloading electrical outlets. Keep the projector out of reach of children and pets to prevent accidental damage or injury. Follow all safety guidelines to ensure safe operation and longevity of the device.
3.2 Proper Ventilation Requirements
Ensure the projector is placed in a well-ventilated area to prevent overheating. Keep at least 10 inches of clearance around the device to allow proper airflow. Avoid placing the projector in enclosed spaces or near flammable materials. Do not cover the ventilation holes, as this can block airflow and damage the unit. Position the projector on a stable, flat surface to maintain optimal cooling. Regularly clean dust from the vents to ensure efficient operation. Proper ventilation is essential for extending the LED lamp life and maintaining performance quality.
3.3 Electrical Safety Guidelines
Use the projector with the provided power adapter only, ensuring compatibility with your region’s voltage requirements. Avoid overloading power strips or extension cords. Never expose the projector to water or moisture, as this can cause electrical hazards. Keep the projector out of reach of children and pets to prevent accidental damage or shock. Always unplug the projector when not in use or during cleaning. Ensure all cables are securely connected to avoid loose connections, which can lead to electrical issues. Follow these guidelines to ensure safe and reliable operation of your mini LED projector.
Setup and Installation
Start by unboxing and inventorying all components, then position the projector on a stable surface. Connect the power cord and turn it on to begin setup.
4.1 Unboxing and Inventory Check
Start by carefully unboxing your mini LED projector and verifying all components are included. Typically, you’ll find the projector unit, a power adapter, HDMI and AV cables, a remote control, and a user manual. Ensure no items are missing or damaged. The user manual is crucial for understanding setup and operation. If any accessories are missing, contact customer support immediately. This step ensures you’re fully prepared for installation and operation, avoiding any delays or issues later on.
4.2 Ideal Placement and Positioning
For optimal performance, place the mini LED projector on a stable, flat surface at a suitable height. Position it directly facing the screen or wall, ensuring it’s parallel for an undistorted image. The recommended projection distance is typically between 1.2 to 2;5 meters, depending on the model. Adjust the projector’s angle and focus to achieve a clear image. Ensure the area is well-ventilated to prevent overheating. Proper placement enhances image quality and ensures reliable operation, providing an immersive viewing experience for home or outdoor use. Always refer to the manual for specific placement guidelines.
4.3 Powering On the Projector
To power on the mini LED projector, first ensure it is properly connected to a power source using the provided adapter. Locate the power button, typically found on the projector or remote control. Press the button, and the indicator light will change color, signaling the device is turning on. Allow a few seconds for the projector to boot up and reach operating temperature. Ensure the projector is placed on a stable, flat surface away from direct sunlight or liquids. Proper power-up ensures reliable performance and longevity of the device.

Operating the Projector
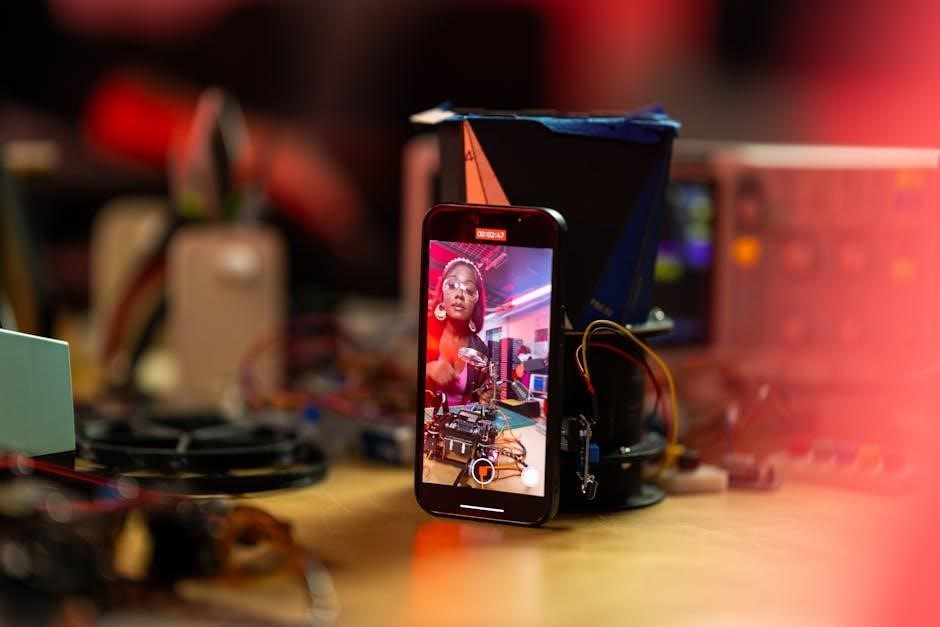
Once powered on, use the control buttons or remote to navigate menus, adjust settings, and focus the image for optimal clarity and viewing experience.
5.1 Basic Controls and Navigation
The projector features intuitive controls, including a power button, navigation buttons, and a focus adjustment knob; Use the remote control to access menus, adjust settings, and switch modes. The navigation buttons allow you to scroll through options, while the OK button confirms selections. The focus knob ensures sharp images by manually adjusting the lens. Additional buttons may include volume control and input selection. Refer to the remote or on-device controls for seamless operation. Ensure the remote has batteries and is within range for reliable functionality. These controls provide easy access to all essential functions for an enhanced viewing experience.
5.2 Manual Focus Adjustment
Manual focus adjustment ensures sharp and clear images. Locate the focus knob, typically on the projector’s top or side. Turn the knob clockwise or counterclockwise to adjust the lens until the image appears sharp. Proper focus is crucial for optimal viewing quality. If the image remains blurry, check the projection distance and screen size. Ensure the projector is positioned correctly relative to the screen. Adjust slowly for precise focus, as over-adjustment may distort the image. This feature allows customization of image clarity to suit your viewing needs, enhancing your overall experience with the mini LED projector.
5.3 Adjusting Image Settings
Adjusting image settings enhances your viewing experience. Use the remote or control panel to access brightness, contrast, and color settings. Keystone correction helps align the image shape. Ensure proper aspect ratio for content. Focus on sharpness for clarity. Save settings for future use. Regular adjustments maintain image quality. Follow manual instructions for precise customization. Proper settings optimize LED lamp performance and battery life, ensuring vivid and clear visuals tailored to your preferences. This feature allows personalized viewing experiences, making the mini LED projector versatile for various content types and environments. Regular adjustments ensure consistent image quality over time.

Connectivity Options
Mini LED projectors offer multiple connectivity options, including HDMI, USB, and wireless features for seamless connection to various devices, ensuring versatile entertainment solutions.
6.1 Connecting via HDMI
Connecting your mini LED projector via HDMI ensures high-quality video and audio transmission. To connect, locate the HDMI port on both your projector and external device (e.g., laptop, Blu-ray player, or gaming console). Use an HDMI cable to link the devices, ensuring it is securely plugged into both ports. Turn on the projector and set it to the correct HDMI input channel using the remote control or on-device buttons. For optimal performance, ensure the HDMI cable is compatible with the projector’s specifications. If no signal is detected, restart both devices and verify the connection. HDMI connectivity supports various resolutions and formats, making it ideal for movies, gaming, and presentations.
6.2 Wireless Connectivity Features
Many mini LED projectors offer wireless connectivity options like Wi-Fi and Bluetooth, enabling seamless connections to smartphones, tablets, and laptops. Use built-in technologies such as Wi-Fi Display, Miracast, or DLNA to stream content wirelessly. Ensure both devices are connected to the same network for smooth transmission. For devices without built-in wireless support, optional adapters can be used. Wireless connectivity eliminates the need for cables, providing a clutter-free and convenient viewing experience. Always ensure firmware is updated for optimal performance and compatibility with various devices.
6.3 Connecting Mobile Devices
To connect mobile devices to your mini LED projector, use HDMI or USB ports for direct wired connections. For wireless options, enable Wi-Fi or Bluetooth on both devices. Use Miracast or DLNA for seamless streaming from Android devices. iPhones can connect via AirPlay if supported. Ensure both devices are on the same network for stable connections. Some projectors offer dedicated apps for easy pairing. Check compatibility before connecting to ensure smooth operation. Always ensure proper pairing and a stable internet connection for optimal performance during wireless streaming.

Maintenance and Care
Regular maintenance ensures optimal performance. Clean the lens and body with soft cloths. Extend LED lamp life by reducing brightness. Ensure proper ventilation to prevent overheating.
7.1 Cleaning the Projector Lens and Body
Regular cleaning is essential for maintaining image quality. Use a soft, dry microfiber cloth to gently wipe the lens and body. Avoid harsh chemicals or abrasive materials, as they may damage the surfaces. For stubborn smudges, lightly dampen the cloth with distilled water, but ensure it is dry before wiping. Never touch the lens with bare hands, as oils can leave smudges. Clean the ventilation grills with a soft brush to ensure proper airflow. Regular cleaning prevents dust buildup and ensures optimal performance. Always turn off the projector before cleaning to avoid any damage or risk of electrical shock.
7.2 Extending LED Lamp Life
To maximize the LED lamp life, ensure proper ventilation and avoid overheating. Use the projector in a well-ventilated area and avoid blocking ventilation holes. Keep the device away from direct sunlight and extreme temperatures. Dimming the brightness when possible can reduce lamp stress. Turn off the projector when not in use to prevent unnecessary wear. Avoid sudden power interruptions, as they can cause lamp degradation. Clean the vents regularly to maintain airflow. Following these tips can help extend the LED lamp life up to 50,000 hours, ensuring consistent performance and color quality over time.
Troubleshooting Common Issues
If the projector fails to turn on, ensure the power cord is securely connected and the outlet is working. For image distortion, adjust the manual focus or check keystone correction settings. Connectivity issues with HDMI or wireless devices can be resolved by restarting the projector or updating firmware. Overheating may occur; ensure proper ventilation and avoid blocking vents. If the LED lamp flickers, consult the warranty or contact customer support. Regularly cleaning the lens and vents can prevent performance issues. Refer to the manual for detailed troubleshooting steps for specific problems.

Advanced Features
Advanced features include color accuracy adjustment, brightness customization, and keystone correction for optimal image alignment, enhancing your viewing experience with precise control and wireless connectivity options.
9.1 Color Accuracy and Brightness Adjustment
Enhance your viewing experience with precise color accuracy and adjustable brightness settings. These features allow customization to suit various lighting conditions, ensuring vibrant and lifelike visuals. Users can manually fine-tune color saturation and contrast levels for optimal image quality. Additionally, brightness adjustment helps maintain eye comfort while preserving the authenticity of the projected content. This level of control makes the mini LED projector versatile for both indoor and outdoor use, delivering consistent performance across different environments and preferences.
9.2 Keystone Correction for Image Alignment
Keystone correction is a digital adjustment feature that ensures your projected image is perfectly aligned and free from distortion, even when the projector isn’t placed directly in front of the screen. This feature allows you to manually or automatically adjust the image shape, ensuring a clear, rectangular display. By eliminating keystone distortion, it enhances viewing comfort and maintains image quality. Proper use of this feature is essential for achieving sharp, focused visuals, making it a valuable tool for both home entertainment and professional presentations, ensuring your content always looks its best.
Accessories
- Included: Remote control, power adapter, AV cable, and HDMI cable for seamless connectivity.
- Optional: External speakers, screen protectors, and carrying bags for enhanced portability and protection.
10.1 Included Accessories
Your mini LED projector typically comes with essential accessories to enhance its functionality. These include a remote control for convenient operation, a power adapter for safe charging, and HDMI and AV cables for connecting external devices. Some models may also provide a carrying bag for portability and a quick start guide to help you get started. These accessories ensure a seamless setup and operation experience. Always check the packaging for a complete list of included items, as they may vary by model.
10.2 Optional Accessories
Optional accessories can enhance your mini LED projector experience. Consider purchasing an external speaker for improved audio quality or a projector mount for flexible installation. Additional HDMI adapters or wireless dongles can expand connectivity options. A high-quality projector screen is recommended for better image clarity. Some users also opt for extra batteries for the remote control or a carry case for protection during travel. These accessories are not included but can significantly improve usability and convenience, ensuring optimal performance in various settings. Explore compatible options to tailor your setup to your needs.
Warranty and Support
The mini LED projector is backed by a one-year warranty covering manufacturing defects. For inquiries or claims, contact customer support at [support email] or [contact number] for assistance.
11.1 Warranty Terms and Conditions
Your mini LED projector is covered by a one-year limited warranty starting from the purchase date. This warranty applies to manufacturing defects in materials and workmanship. To make a claim, you must provide proof of purchase and a detailed description of the issue. The warranty does not cover damages caused by misuse, accidents, or unauthorized repairs. Contact customer support via email or phone for assistance with warranty claims. For more details, refer to the warranty section in your user manual or the manufacturer’s official website.
11.2 Customer Support Contact Information
For any inquiries or issues with your mini LED projector, our customer support team is here to assist. Please contact us via email at support@miniprojector.com or call our hotline at +1-800-123-4567. You can also visit our official website at www.miniprojector.com/support for troubleshooting guides, FAQs, and to submit a support ticket. We are committed to providing prompt and effective solutions to ensure your satisfaction. Our support services are available Monday through Friday, 9 AM to 6 PM EST.