

e-bike lcd display manual
E-bike LCD displays are the central interface, mirroring the bike’s operational status and offering crucial rider data․
These screens, as detailed in troubleshooting guides, present speed, battery life, and assist levels․
Displays, like those discussed on YouTube, are vital for safe and informed riding, enhancing the overall e-bike experience․
Understanding these displays is key to maximizing your e-bike’s potential and addressing potential issues․
What is an E-Bike LCD Display?
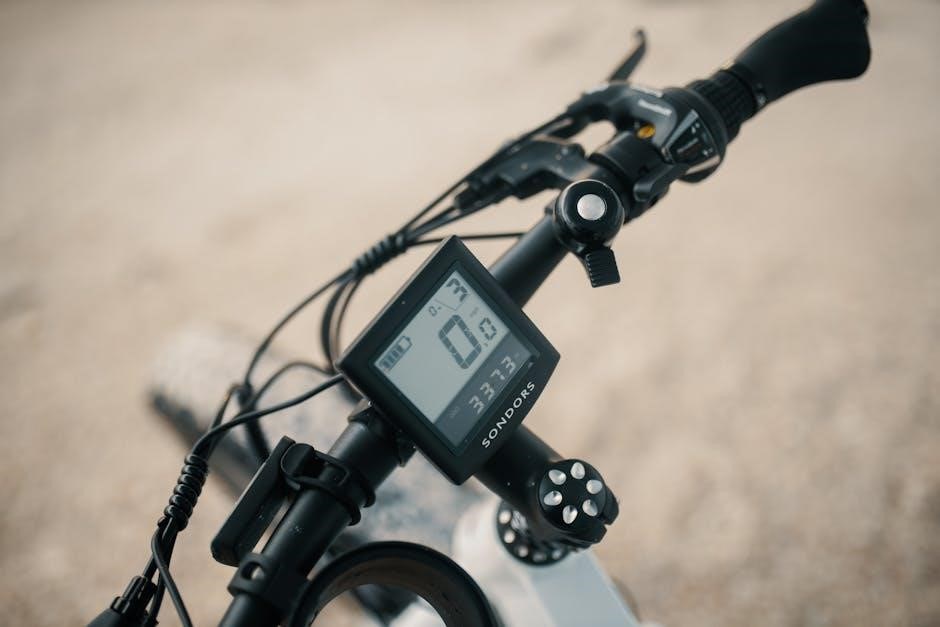
An E-Bike LCD Display is a digital interface mounted on the handlebars, serving as the primary communication hub between the rider and the electric bike’s system․ Essentially, it’s a miniature dashboard providing real-time data․ As highlighted in online resources, these displays showcase critical information like current speed, distance traveled (odometer and trip distance), and the remaining battery capacity․
Beyond basic metrics, an LCD display allows riders to select pedal assist levels, adjusting the motor’s contribution to their effort․ Modern displays, as seen in troubleshooting guides, may even include features like error code reporting, indicating potential mechanical or electrical faults․ They translate complex system data into easily understandable visuals, enhancing control and safety․
Importance of the Display for E-Bike Functionality
The E-Bike LCD Display is paramount to optimal functionality, extending far beyond simply showing speed․ It’s the rider’s direct link to controlling the bike’s power output and monitoring its health․ Without a functioning display, accurately gauging battery life becomes impossible, potentially leading to unexpected power loss during a ride – a significant safety concern․
Furthermore, the display enables efficient use of pedal assist, allowing riders to conserve energy and extend range․ Troubleshooting guides emphasize that a malfunctioning display can mask underlying issues, hindering proper diagnosis․ It’s the central point for accessing settings and understanding error codes, ensuring a safe and enjoyable riding experience․
Understanding Common Display Types
E-bike LCD displays vary from basic models showing essential data, to mid-range options with enhanced features, and advanced TFT screens offering smart customization․
These displays, as highlighted in online resources, cater to diverse rider needs and budgets, impacting functionality and user experience․
Basic LCD Displays: Features and Limitations
Basic LCD displays represent the entry point for e-bike instrumentation, typically showcasing fundamental information like speed, battery level, and assist mode․ These displays, often monochrome, prioritize simplicity and affordability․ They generally offer limited customization options and may lack advanced features such as trip data or detailed diagnostics․
However, their simplicity can also be a limitation․ Troubleshooting guides emphasize that basic displays may be less intuitive for some riders, and their limited feature set might not satisfy those seeking comprehensive ride data․ While reliable for core functions, they are more susceptible to glare in direct sunlight, potentially hindering visibility․ They are a cost-effective solution, but lack the sophistication of more advanced options․
Mid-Range LCD Displays: Enhanced Features
Mid-range LCD displays bridge the gap between basic and advanced options, offering a richer feature set without a significant price increase․ These displays typically feature improved readability, often with a backlit screen for better visibility in various lighting conditions․ They commonly include trip distance, total distance traveled (odometer), and potentially power output information․
Compared to basic models, mid-range displays often allow for some level of customization, such as adjusting brightness or switching between metric and imperial units․ Troubleshooting resources highlight their increased diagnostic capabilities, potentially displaying error codes․ While not as feature-packed as high-end TFT screens, they provide a substantial upgrade in functionality and user experience․
Advanced LCD/TFT Displays: Smart Features and Customization
Advanced LCD or TFT displays represent the pinnacle of e-bike interface technology, offering a wealth of smart features and extensive customization options․ These displays often boast full-color screens with high resolution, providing a visually appealing and informative experience․ Beyond standard metrics like speed and battery level, they may integrate Bluetooth connectivity for smartphone pairing and data logging․
Users can often personalize the display layout, choosing which data points are shown and adjusting screen themes․ Some advanced displays even offer navigation features or integrate with fitness apps․ Troubleshooting guides emphasize their sophisticated diagnostic capabilities, providing detailed error information․ These displays elevate the e-bike experience, offering a connected and highly customizable ride․
Key Information Displayed
E-bike LCD displays consistently show vital data: speed, battery level, assist mode, trip distance, and total mileage․
These metrics, highlighted in troubleshooting resources, ensure informed and safe riding․
Understanding these key indicators allows riders to monitor performance and make necessary adjustments during their e-bike journeys․
Speedometer and Odometer Readings
Speedometer functionality on an e-bike LCD display provides real-time speed readings, crucial for adhering to traffic laws and maintaining safe riding practices․ These displays typically offer readings in both miles per hour (MPH) and kilometers per hour (KMH), adjustable through the display settings․
Odometer readings, conversely, track the total distance traveled by the e-bike over its lifespan․ This is valuable for maintenance scheduling, tracking usage, and potentially for warranty purposes․ Many displays also feature a trip odometer, which resets after each ride, allowing riders to monitor the distance covered on a specific journey․ Accurate calibration of wheel size is essential for precise speedometer and odometer readings, ensuring reliable data for the rider․
These readings, as noted in various e-bike guides, are fundamental to the overall riding experience․
Battery Level Indicator and Voltage
Battery level indicators on e-bike LCD displays are essential for range estimation and preventing unexpected power loss during rides․ These indicators commonly use a segmented bar or percentage display to visually represent the remaining battery capacity․ Understanding this display is crucial for planning routes and avoiding running out of power․
Beyond the percentage, some advanced displays also show the battery voltage․ Monitoring voltage can provide a more precise understanding of the battery’s health and identify potential issues before they lead to complete failure․ A decreasing voltage under load can indicate a weakening battery․ Troubleshooting guides emphasize checking connections if the display shows unusual voltage readings․
Accurate battery information empowers riders to manage their e-bike effectively․
Assist Level Selection
Assist level selection is a core function displayed on e-bike LCD screens, allowing riders to control the motor’s power output․ Typically represented by numbered levels (1-5 or 1-9), these settings dictate how much the motor assists with pedaling․ Lower levels conserve battery, while higher levels provide more powerful assistance for hills or faster speeds․
The LCD display visually indicates the currently selected assist level, often with icons or numerical values․ Adjusting the assist level is usually done via buttons on the display unit or handlebar-mounted controls․ Understanding these settings is vital for optimizing range and tailoring the riding experience to individual preferences and terrain․
Proper assist level management enhances both efficiency and enjoyment․

Trip Distance and Total Distance
E-bike LCD displays consistently track and present two crucial distance metrics: trip distance and total distance․ Trip distance measures the distance covered during the current ride, resetting each time the e-bike is turned off․ This is useful for monitoring individual journeys and planning routes;

Total distance, conversely, accumulates the overall distance the e-bike has traveled throughout its lifespan․ This provides valuable insight into the bike’s usage and can be helpful for maintenance scheduling․ Both values are typically displayed in kilometers or miles, selectable via display settings․
Accurate distance tracking aids in ride analysis and long-term e-bike care․

Troubleshooting Common Display Issues
E-bike LCD displays can encounter problems like failing to power on, freezing, or exhibiting backlight issues, as detailed in online guides․
Addressing these faults ensures continued functionality and a safe riding experience;
Display Not Turning On: Initial Checks
If your e-bike’s LCD display fails to illuminate, begin with simple checks before assuming a serious fault․ First, ensure the battery is fully charged and securely connected; a loose connection is a common culprit․
Verify the power switch on the display itself is activated, if applicable․ Inspect the wiring harness connecting the display to the controller for any visible damage, such as frayed wires or loose connectors․
Consult your e-bike’s manual for specific reset procedures, as some models have a dedicated reset button or sequence․ If the issue persists, try disconnecting and reconnecting the display cable to ensure a solid connection․ Remember to reference troubleshooting guides, like those found online, for model-specific advice․
Display Freezing or Glitching
A frozen or glitching e-bike LCD display can be frustrating, often indicating a temporary software issue or a more significant hardware problem․ Begin by attempting a soft reset – turning the e-bike off and on again․ This often resolves minor software glitches․
If the problem persists, check for any physical obstructions or damage to the display screen․ Ensure the display cable is securely connected to both the display and the controller․ Refer to your e-bike’s manual for specific troubleshooting steps, as some models offer diagnostic modes․
Online resources suggest that intermittent glitches might indicate a failing connection or a need for a firmware update, if available․
Backlight Problems: Dim or Non-Functional
A dim or non-functional backlight on your e-bike’s LCD display significantly impacts visibility, especially in low-light conditions․ First, check the display’s brightness settings – it may be set to a very low level․ Many displays have adjustable brightness controls, often accessed through a button combination․
If the brightness is already maximized, the issue could be a failing backlight or a problem with the display’s power supply․ Inspect the display cable for damage or loose connections․ Consult your e-bike’s manual for specific instructions on backlight troubleshooting․
Some displays allow for backlight testing within diagnostic menus․
Error Codes and Their Meanings
E-bike LCD displays often communicate issues through specific error codes․ These codes, detailed in your e-bike’s manual, provide valuable diagnostic information․ Common codes relate to motor faults, battery issues, or sensor malfunctions․ Ignoring these codes can lead to further damage․
For example, a code indicating a motor error might suggest a wiring problem or a faulty motor controller․ Battery-related codes could point to low voltage, overcharge, or a failing battery cell․ Always consult your manual to decipher the specific meaning of each code․
Online forums and manufacturer support can also assist in understanding error codes․
Display Settings and Customization

E-bike LCD displays offer adjustable settings like brightness, contrast, and units (MPH/KMH)․ Wheel size calibration ensures accurate speed readings, enhancing the riding experience․
Some displays feature password protection for security, as outlined in the e-bike manual, allowing personalized control․
Adjusting Brightness and Contrast
Brightness and contrast adjustments are fundamental for optimal e-bike LCD display visibility․ Most displays feature a menu system, often accessed via button combinations, allowing riders to tailor the screen’s appearance to varying light conditions․
Increasing brightness enhances readability in direct sunlight, while decreasing it conserves battery power during nighttime rides․ Contrast adjustments refine the clarity of displayed information, ensuring sharp text and icons․ Experimenting with these settings is crucial for a comfortable viewing experience․
Refer to your specific e-bike’s manual for detailed instructions on navigating the display menu and adjusting these parameters․ Improper settings can lead to eye strain or difficulty interpreting critical data while riding, so finding the ideal balance is essential․
Units of Measurement (MPH/KMH)
E-bike LCD displays commonly allow riders to select their preferred unit of measurement for speed: miles per hour (MPH) or kilometers per hour (KMH)․ This customization is typically found within the display’s settings menu, accessible through a series of button presses․
The ability to switch between MPH and KMH caters to diverse rider preferences and regional standards․ Changing this setting doesn’t affect the bike’s performance, only the displayed speed reading․ Consult your e-bike’s manual for the specific button sequence to access and modify this setting․
Ensuring the correct unit is selected is vital for accurate speed monitoring and adherence to local traffic regulations․ Incorrect units can lead to misjudging speed and potentially unsafe riding conditions․
Wheel Size Calibration
Accurate wheel size calibration is crucial for precise speed and distance readings on your e-bike’s LCD display․ The display calculates these values based on the number of wheel rotations; an incorrect wheel size setting leads to inaccurate data․
Most displays allow you to input your wheel diameter in millimeters․ This information is usually found on the tire sidewall․ Access the wheel size setting through the display’s menu, often requiring a specific button combination as detailed in your e-bike’s manual․
Proper calibration ensures your speedometer and odometer reflect your actual speed and distance traveled, enhancing the reliability of your e-bike’s performance data․
Password Protection and Security Features
Advanced e-bike LCD displays often incorporate password protection to deter theft and unauthorized use․ This feature prevents others from altering settings or accessing ride data without the correct PIN․
To enable password protection, navigate to the security settings within the display’s menu․ You’ll be prompted to create a unique, memorable code․ Remember this code, as losing it may require a factory reset, erasing all customized settings․
Some displays offer additional security features, like disabling the motor or locking the assist levels when a password is set․ Consult your e-bike’s manual for specific instructions and available options․
Display Maintenance and Care
Regular maintenance ensures longevity․ Gently clean the screen with a soft cloth, avoiding harsh chemicals․ Protect from water and extreme temperatures for optimal performance․
Following these simple steps, as outlined in e-bike guides, will keep your display functioning reliably and clearly for years to come․
Cleaning the Display Screen
Maintaining a clean display is crucial for optimal visibility and longevity․ Always power off your e-bike before cleaning to prevent accidental activation or damage․ Use a soft, microfiber cloth – the type used for eyeglasses or camera lenses – to gently wipe the screen․
Avoid abrasive cleaners, solvents, or excessive moisture․ A slightly damp cloth is acceptable, but ensure no water enters the display housing․ Stubborn smudges can be addressed with a specialized electronics screen cleaner, applied sparingly to the cloth, not directly onto the screen․
Regular cleaning, even just a quick wipe-down after each ride, prevents dust and grime buildup, ensuring clear readability and protecting the display from potential scratches․ Remember, a clean display contributes to a safer and more enjoyable riding experience․
Protecting from Water Damage
Water damage is a significant threat to e-bike LCD displays․ While many displays offer some level of water resistance, they are not typically waterproof․ Avoid direct exposure to rain, puddles, or washing your e-bike with a high-pressure hose․
If your display does get wet, immediately power off the e-bike and gently dry the screen with a soft, absorbent cloth․ Do not use a hairdryer or other heat source, as this can cause further damage․ Allowing the display to air dry thoroughly is best․
Consider using a display cover or screen protector during inclement weather․ Regularly inspect the display housing for any cracks or openings that could allow water ingress, and address them promptly to prevent costly repairs․
Avoiding Extreme Temperatures
E-bike LCD displays are sensitive to temperature extremes․ Prolonged exposure to very hot or cold conditions can negatively impact their performance and lifespan․ Avoid leaving your e-bike in direct sunlight for extended periods, especially during summer months, as this can overheat the display․
Similarly, storing your e-bike in freezing temperatures can cause the LCD screen to become sluggish or even crack․ When storing your e-bike, choose a cool, dry place with moderate temperatures․
If the display has been exposed to extreme temperatures, allow it to return to a normal operating temperature before powering it on․ This helps prevent potential damage to the internal components․
Replacing an E-Bike LCD Display
Replacing an e-bike display requires finding a compatible unit and deciding between DIY installation or professional service, ensuring proper functionality․
Carefully consider your technical skills before attempting a replacement, as incorrect installation can cause further issues․
Finding a Compatible Replacement
Locating a compatible replacement for your e-bike’s LCD display demands careful attention to detail․ Not all displays are universally interchangeable; compatibility hinges on several factors, including the e-bike’s motor controller, voltage, and communication protocol․
Begin by identifying your existing display’s model number, often found on the back of the unit․ Consult your e-bike’s manual or the manufacturer’s website for specific replacement recommendations․ Online retailers specializing in e-bike components often provide compatibility filters, allowing you to narrow down options based on your bike’s make and model․
Pay close attention to connector types and pin configurations to ensure a seamless connection․ If unsure, contacting a professional e-bike technician for guidance is highly recommended to avoid purchasing an incompatible display․
DIY Replacement vs․ Professional Installation
Deciding between a DIY replacement and professional installation for your e-bike’s LCD display depends on your technical skills and comfort level․ While replacing the display can be a cost-effective option for experienced DIYers, it requires a basic understanding of electrical wiring and e-bike systems․
Incorrect installation can lead to further damage or safety hazards․ If you’re unfamiliar with electrical components or lack the necessary tools, opting for professional installation is strongly advised․ A qualified technician will ensure proper connection, configuration, and testing of the new display․
Professional installation offers peace of mind and guarantees a correctly functioning display, safeguarding your investment and ensuring a safe riding experience․